
I rarely work from a pattern, so I've been using some great internet resources to try to plan this out. Claudine's Idle Hands Blog has been extremely useful.
The first step is of course the pannier hoop skirt, which gives the dress its distinctive shape. To make it you need stretch free fabric and steel banding to make the hoops. The easiest way to get the banding is to go to a lumberyard and ask for steel lumber strapping. They will give it to you for free if you can use the stuff they have taken off of wood bales and are going to throw away, or you can buy it from them new for about $0.30 cents a foot. It comes on a giant reel and you have to wind it up and tape it to transport it. I cut up an old bed sheet for the fabric component, although you can splurge and use silk or something like Claudine did.
Working without a pattern means one thing, of course, lots of math and some trial and error. I started just by making an ellipse on the floor with ribbon to decide what the bottom perimeter measurement needed to be. I settled on about 120", not wanting it to be too terribly big. Then I started graphing using some graph paper I generated online. Graph Paper Generator

To get the measurements, I basically drew out the shape I wanted the finished product to have, then I measured the distance across the skirt at 5 evenly spaced places. Using these figures, I created a set of ratios to represent the relationship of these measurements (with the bottom rung equalling 1 and the smaller ones equalling a fraction of 1). Then I multiplied the fractions by the number 120, which represents the desired size of the bottom. This gave me the sizes for all of the hoops and the information I needed to cut the skirt, which was just 2 identical bell shaped pieces.
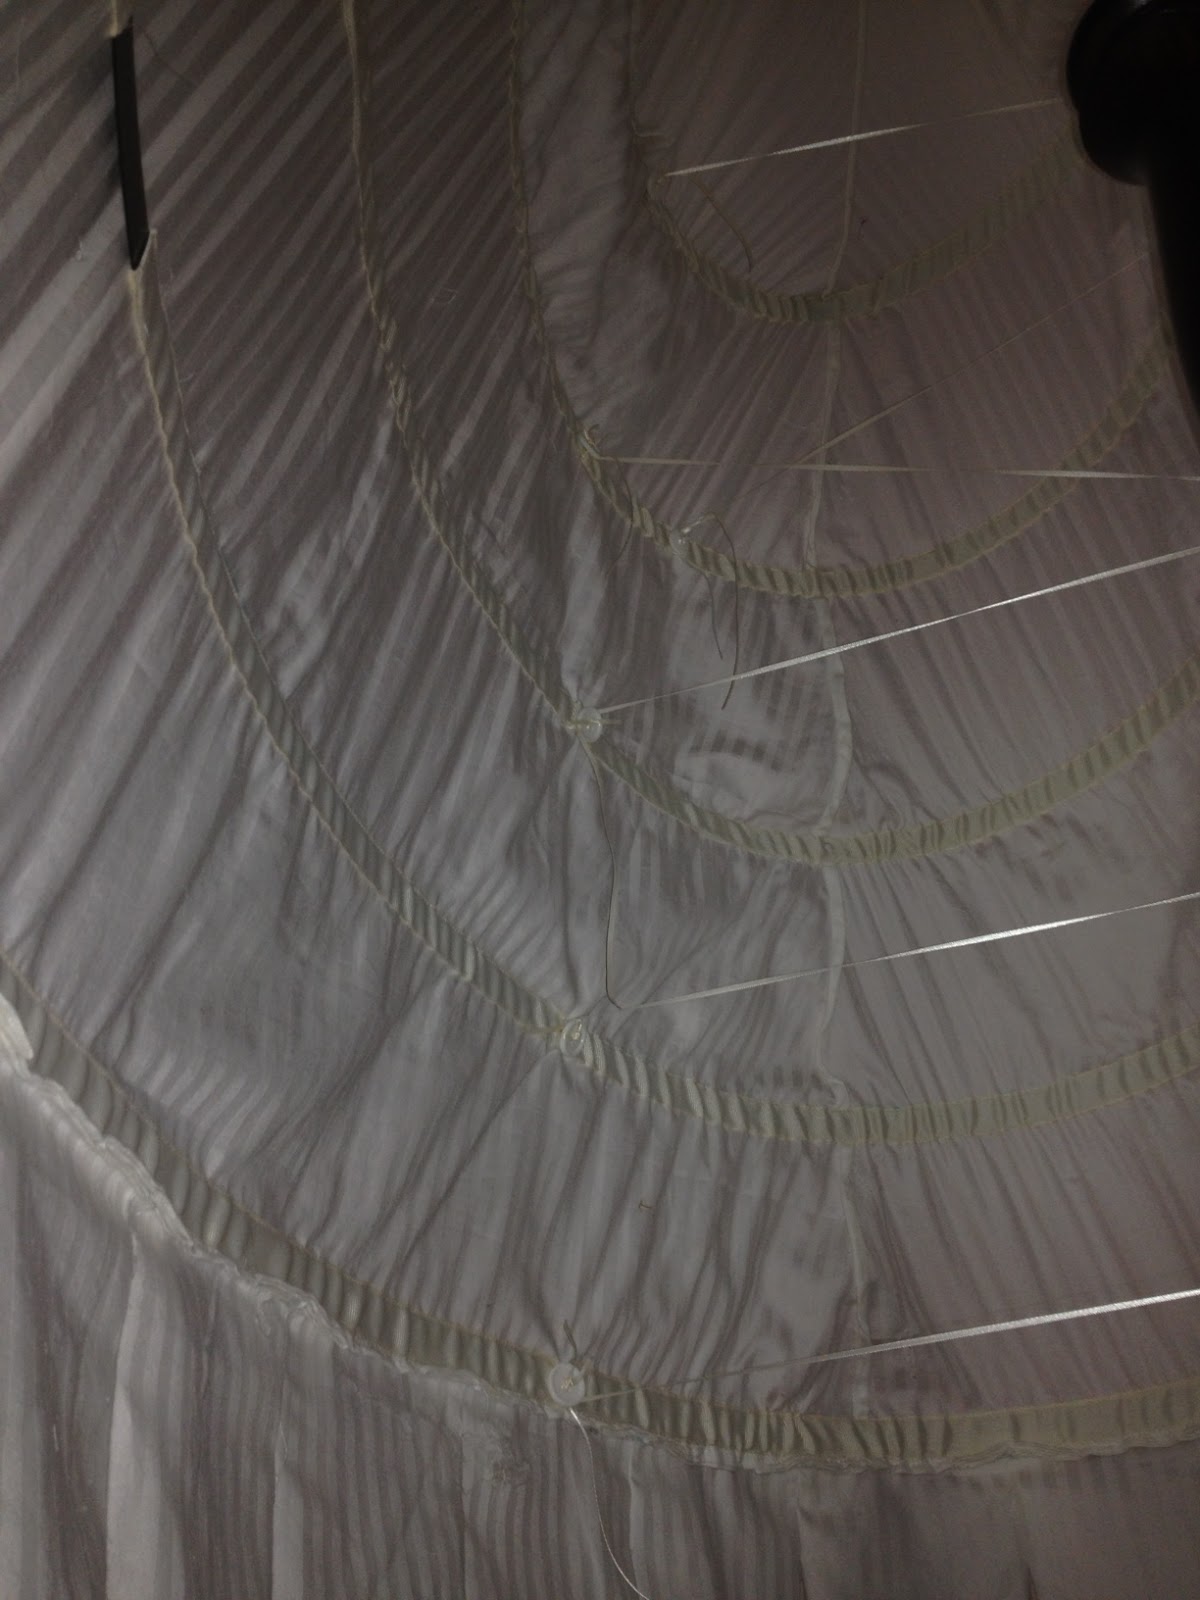
This is my first shot of the pannier with the hoops installed. One thing about a pannier as opposed to a circular hoop is that the hoops have to be secured inside the skirt to make it elliptical. Otherwise it will tend to pop into the round no matter how you have cut the fabric. In this photo the bottom 3 hoops have yet to be secured, and the top two have just been tied into shape with embroidery floss. All of this while I was coming up with a good way to do the stay strings. It looks like Claudine used strings tied together, but I completely lack the coordination to tie things together which are under pressure, so I decided to engineer something that would be a little bit more controllable and adjustable.

What I came up with was kind of a string clasp mechanism like you see on brown envelopes. I attached a 1/8" ribbon to one side of the hoop and a button to the other side, allowing the string to be tightened and attached by winding the end of the string around the button.
Final product...


Not too bad, I think. Looks a lot like Claudine's, which was my goal.